
The first three articles covered GD6’s product overview, hardware design, and open-source code usage. This article addresses what field engineers care about most: taking a GD6 from the box to a live deployment.
We walk through three mainstream network server integration paths — ThinkLink platform, ChirpStack, and TTN (The Things Network) — along with network backhaul configuration, frequency band setup, system maintenance, and common troubleshooting. All steps are based on the current versions of the GD61x Specifications (v1.4) and the gwTool6 Configuration Guide (v1.0).
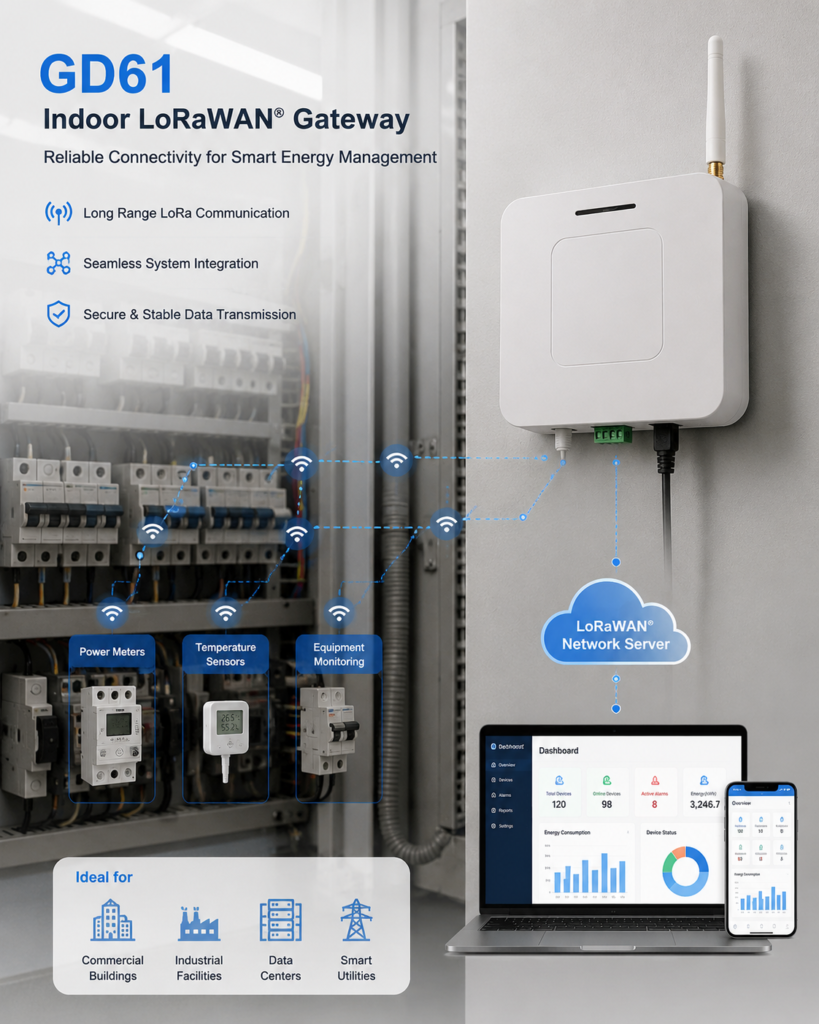
Unboxing and Installation
Checklist
After unboxing, verify the following items:
- GD6 gateway unit
- LoRa antenna (matching the gateway’s RF version)
- Power adapter (if included with order)
- SIM card (only for AG configuration; must be activated for data service)
The gateway model is printed on the device label. The format is GD61{4|8}-A{N|G}-{region code}-{version code}-{1|2}. For example, GD618-AG-AS923-N-2 means: 800 MHz+ RF, with 4G and PoE, AS923 region, default version, SX1302 concentrator.
Verify that the region code matches your deployment area. The region code must match the RF hardware — this is a physical constraint, not a software configuration issue.
Installing the LoRa Antenna
Connect the LoRa antenna before powering on. Starting LoRa transmission without an antenna may damage the concentrator chip.
- Confirm the antenna frequency band matches the gateway’s region version (868 / 915 / 470, etc.)
- Screw the antenna onto the LoRa connector until snug — do not overtighten
- Wi-Fi and 4G antennas (AG configuration) are internal; no external connection needed
Installing the SIM Card (AG Configuration Only)
- Power off the gateway
- Insert an activated SIM card into the SIM slot
- If the SIM has a PIN set, you’ll need to enter the 4–8 digit PIN in the web console later
Placement
GD6 supports desktop placement or wall mounting using the rotating bracket on the bottom. Do not block the ventilation holes on the bottom of the enclosure.
First Power-Up and Connection
Selecting a Power Source
Choose one method — do not connect multiple power sources simultaneously:
| Power Method | Spec | Port |
| Type-C | 5V DC | USB Type-C |
| DC terminal | 5–24V DC | 5–24V and G terminals |
| PoE | AG configuration only | RJ45 (requires matching PoE device) |
Do not connect power to the
A+andB-terminals — these are reserved RS-485 pins with no user functionality in the current version.
LED Indicator States
After power-on, the LED enters a slow blink pattern (default: 1s on / 1s off), indicating normal operation. System initialization, IP acquisition, and LoRa service startup take some time.
| LED Pattern | Meaning |
| Slow blink (1s on / 1s off) | Normal operation |
| Steady on at 2s → 3 fast blinks → reboot | Factory reset in progress |
Connecting via Ethernet
- Connect the gateway’s RJ45 port to a router or switch
- The gateway obtains an IP address via DHCP by default
- Find the gateway’s address in the router’s DHCP lease list
- Open
http://<gateway-address>in a browser
Connecting via Wi-Fi AP
If Ethernet access is not available, use the default Wi-Fi hotspot:
- Connect to the Wi-Fi hotspot
LGW-Configfrom a phone or computer - Enter the hotspot password
lgw12345678 - Open
http://192.168.4.1
First Login
- Default web login password:
wifi!0804 - Change the password immediately after first login: go to “User Management”, enter the current password and a new password (minimum 8 characters), and save
- The hotspot password and web login password are two separate passwords — do not confuse them
Configuring Network Backhaul
GD6 supports three backhaul links with default Ethernet priority and automatic failover. Configuration: Web Console → corresponding network page.
Ethernet Configuration
- Open the “Ethernet” page
- Select DHCP or static IP
- For static IP, enter IP address, subnet mask, default gateway, and DNS
- Save — some address changes may require reconnection or reboot
“Ethernet Power” controls the gateway’s internal Ethernet controller runtime power, not external PoE output. Disabling or restarting the port temporarily interrupts the current connection.
Wi-Fi STA Configuration
The Wi-Fi page has three controls:
- Master switch: turns off the entire Wi-Fi radio
- AP (hotspot): modify the local configuration hotspot’s SSID, password, channel, and max connections
- STA (client): scan and connect to on-site Wi-Fi as a backhaul link
STA configuration steps:
- Open the “Wi-Fi” page, click “Scan” in the STA section
- Select the target Wi-Fi from the list (2.4 GHz only)
- Enter the password and save
- Once connected, STA serves as a backup backhaul link
Modifying AP parameters disconnects the current wireless session — reconnect using the new SSID or password. Before disabling Wi-Fi, confirm you can still access the gateway through another management link.
4G Configuration (AG Configuration Only)
- Open the “4G / LTE” page
- Enter the carrier APN (username and password usually left blank)
- Enter the SIM PIN if set
- Keep the serial baud rate consistent with the delivered module
- Select routing priority and save
The status area displays SIM status, network registration, carrier, signal, access technology, and PPP address.
Mask IMEI, ICCID, and other device identifiers before sharing screenshots.
Link Priority and Automatic Failover
Default link priority: Ethernet > Wi-Fi STA > 4G. When the primary link fails, the gateway automatically switches to a backup link. When the primary link recovers, it switches back. With all three links configured, the gateway always maintains at least one available backhaul.
Connecting to the ThinkLink Platform
ThinkLink is an IoT platform by ManThink. GD6 is the native gateway hardware for ThinkLink, making the connection process straightforward.
Register the Gateway on ThinkLink
- Log in to the ThinkLink platform
- Navigate to the gateway management page and add a new gateway
- Enter the Gateway EUI (found in the GD6 web console “Overview” page)
- Select the region configuration matching the gateway’s RF hardware
Configure LNS on GD6
ThinkLink supports both UDP and MQTT access methods.
UDP Packet Forwarder method:
- Open GD6 web console → “LNS Configuration”
- Set uplink driver to Packet Forwarder, protocol to Semtech UDP
- Enter the server address, uplink port, and downlink port provided by ThinkLink
- Configure Keepalive, status reporting, and push timeout as required by the platform
- Save and confirm LoRa service status and server ACK recovery
MQTT Bridge method:
- Set uplink driver to Packet Forwarder, protocol to MQTT Bridge
- Enter the Broker URI, Client ID, username, and password
- Configure QoS and local UDP port
- For TLS, upload the CA certificate; for mutual TLS, also upload the client certificate and private key
- Save and confirm MQTT bridge connection status shows connected
Verify Data Arrival
- Check the gateway online status in the ThinkLink console
- Trigger an uplink from a registered LoRaWAN end device
- Confirm uplink data appears in the ThinkLink device data page
Connecting to ChirpStack
ChirpStack is a popular open-source LoRaWAN network server. GD6 connects to ChirpStack via Basic Station LNS.
Prerequisites
Before starting, prepare:
- Gateway EUI, frequency band, and channel plan
- A ChirpStack account with gateway creation permissions
- The ChirpStack Gateway Bridge Basic Station LNS WebSocket address
- For TLS: the required CA; for mutual TLS: also the gateway’s client certificate and private key
- A gateway management link that won’t be interrupted by LoRaWAN service changes
Configure ChirpStack Gateway Bridge
- Enable the
basic_stationbackend in the ChirpStack Gateway Bridge configuration and set the listen address - Set the
router_configchannel plan matching the gateway hardware and region - Select an authentication mode:
- No auth: isolated test networks only
- Server TLS: configure server certificates and provide the signing CA to the gateway
-
Mutual TLS: additionally configure
ca_certfor verifying gateway client certificates
- For mutual TLS, the client certificate’s Common Name (CN) must be the 64-bit gateway ID in hex (e.g.,
0102030405060708) - Restart Gateway Bridge and confirm the WebSocket listen port is open
Register the Gateway in ChirpStack
- Create a gateway under the ChirpStack tenant
- Enter the Gateway ID/EUI matching the device label
- Select the region configuration matching the Gateway Bridge
router_configand gateway RF hardware - Save and keep the gateway detail page visible for verification
Configure Basic Station on GD6
Switching to Basic Station may restart the LoRa service or the entire gateway. Confirm no OTA, configuration writes, or critical downlink operations are in progress before proceeding.
- Log in to the GD6 web console and open “LNS Configuration”
- Switch the uplink driver to Basic Station and select LNS direct
- Enter the full address in
tc.uri:- No TLS:
ws://<gateway-bridge-address>:<port> - TLS:
wss://<gateway-bridge-domain>:<port>
- No TLS:
- For TLS, upload the CA certificate that signed the server certificate
- For mutual TLS, also upload the gateway’s client certificate and private key — confirm the certificate CN matches the Gateway ID
- Only fill in Authorization if a reverse proxy requires a Token — do not use another platform’s API Key for ChirpStack
- Save, wait for LoRa service recovery, and re-open the page to verify the current configuration
Verify Connection
- Confirm “Last seen” or online time starts updating on the ChirpStack gateway page
- Trigger an uplink from a known LoRaWAN end device
- Check LoRa service status and logs in the GD6 web console
- Confirm the same uplink appears in ChirpStack gateway events
- For TLS, check Gateway Bridge logs for certificate CN, validity, or system time errors
Connecting to TTN / The Things Stack
TTN (The Things Network) and TTI (The Things Industries) use The Things Stack, accessible via Basic Station with LNS direct or CUPS bootstrap.
Register the Gateway in TTN Console
- Create a gateway in The Things Stack Console
- Enter the gateway ID and the Gateway EUI from the device label
- Select the Frequency Plan matching the gateway’s RF hardware
- Record the Server Address for the current deployment —
<server-address>in subsequent steps must use this value
Choose LNS or CUPS
| LNS Direct | CUPS Bootstrap | |
| Purpose | Transport LoRaWAN uplink/downlink data | Centralized configuration and automatic LNS credential distribution |
| Credentials | Manually maintained LNS API Key | CUPS auto-distributes LNS credentials, overwriting local values |
| Best for | Small-scale deployment | Large-scale deployment, centralized management |
Prepare LNS Credentials
- Create a gateway API Key with only “Link as Gateway to a Gateway Server for traffic exchange” permission
- LNS address uses
wss://<server-address>:8887 - Obtain the PEM trust certificate matching the deployment domain from The Things Stack Root Certificates page
- Format the API Key as a CRLF-terminated Authorization line:
Never write real API Keys into documentation, screenshots, or tickets.
Prepare CUPS Credentials (CUPS Mode Only)
- Create a CUPS API Key with permissions to view gateway info, edit basic settings, and read gateway secrets
- Save the LNS API Key in the gateway’s General Settings under LoRa Basics Station LNS Authentication Key
- CUPS address uses
https://<server-address>:443 - Format the CUPS API Key as a CRLF-terminated
cups.key:
Configure Basic Station on GD6
LNS direct method:
- Open “LNS Configuration” and select Basic Station direct
- Enter
wss://<server-address>:8887intc.uri - Upload the LNS Trust PEM
- Upload or paste the complete
lns.keycontent in the Authorization/Key field - Save, wait for service recovery, and re-read the configuration
CUPS bootstrap method:
- Select Basic Station CUPS
- Enter
https://<server-address>:443incups.uri - Upload the CUPS Trust PEM and
cups.key - Save and wait for CUPS to distribute LNS parameters
- Do not overwrite the distributed values with old local LNS settings
Verify Connection
- Check the gateway Live data in TTN Console — confirm connection events and uplinks start appearing
- Trigger a known end device uplink and verify the Gateway EUI, frequency plan, and timestamp
- Check LoRa service status in the GD6 web console
- For CUPS, confirm the gateway has received LNS address and credentials, not still using old configuration
Frequency Band and RF Configuration
Region and Sub-band Selection
Configure in the “Frequency & RF” page:
| Region | Sub-bands | Notes |
| CN470 | Selectable sub-bands | Choose applicable sub-bands per regional plan |
| US902 (US915) | Selectable sub-bands | Choose applicable sub-bands per regional plan |
| AU915 | Selectable sub-bands | Choose applicable sub-bands per regional plan |
| AS923 | AS923-1 through AS923-4 | Select the variant matching your deployment region |
| EU868 / EU433 | Preset plans | Use the corresponding preset channel plan |
The region plan must match the device’s RF front-end and LoRa antenna. You cannot convert a gateway from one frequency band to another through the web interface alone.
Configuration Application
- After modifying channels, click “Apply”
- Restart the LoRa service if needed
- Only switch the uplink driver (Packet Forwarder ↔ Basic Station) or reboot the entire system when explicitly prompted
- A normal reboot takes approximately 90 seconds to restore access
System Maintenance
Viewing System Logs
The “System Logs” page supports:
- Real-time viewing of web, network, Packet Forwarder, MQTT, and communication module logs
- Filtering by level (DEBUG/INFO/WARN/ERROR) or source
- Pausing scroll, clearing, and downloading logs
Check logs for addresses, EUIs, or network identifiers before sharing.
Firmware Upgrade (A/B OTA in Practice)
- Open the “Firmware Upgrade” page and verify the current version and active partition
- Select a
.binfirmware matching the gateway model, hardware version, and target region - Wait for upload, verification, and write to complete
- Reboot as prompted, then log in again and verify the firmware version
Critical notes:
-
Do not upload a full Flash image (
-full.bin) as a Web OTA firmware — OTA writes to the backup partition, not the entire Flash - Do not refresh the page, disconnect the network, or power off during upgrade
- OTA uses A/B dual-partition: new firmware writes to the inactive partition, and the boot partition switches after verification passes
Factory Reset
Using the REC button:
- Press and hold the REC button
- After 2 seconds, the LED turns steady on → factory reset executes → 3 fast blinks → reboot
- Wait for the gateway to finish rebooting
Factory reset restores:
- Network configuration (Ethernet / Wi-Fi / 4G)
- LoRaWAN server configuration
- MQTT and remote configuration
- Login password resets to
wifi!0804
Factory reset does not restore:
- Gateway EUI (preserved)
- Web static files (not overwritten)
File System Management
The “File System” page allows managing files under /spiffs. Configuration JSON files typically take effect after reboot.
Overwriting
web/files may render the console inaccessible, and factory reset will not restore corrupted web files. Do not modify this directory unless performing controlled maintenance.
Common Troubleshooting
No LoRa Uplink
Check in the following order:
| Check Item | Action |
| Antenna | Confirm antenna is connected and frequency band matches |
| Region/band | Confirm region code matches RF hardware |
| Gateway EUI | Confirm it matches the EUI registered on the network server |
| LNS address/port | Confirm address and port are correct; check firewall rules |
| Backhaul link | Confirm the current backhaul link is online (check “Overview” page) |
| LoRa service status | Check Packet Forwarder / Basic Station errors in logs |
4G Registration Failure (AG Configuration)
| Check Item | Action |
| SIM card | Confirm SIM is inserted and activated for data service |
| PIN | Confirm the PIN entered in the web console is correct |
| APN | Confirm APN matches the carrier |
| Signal | Check signal strength in the status area; adjust installation position if needed |
| Module bands | Confirm the module’s supported bands match the carrier |
Web Console Inaccessible
| Check Item | Action |
| Same subnet | Confirm the terminal and gateway are on the same subnet |
| DHCP address | Find the gateway address in the router’s DHCP lease list |
| AP mode | Connect to LGW-Config hotspot and access 192.168.4.1 |
| All management links unavailable | Perform a factory reset |
Boot Failure After OTA
- Wait for automatic reboot to complete
- If still inaccessible, perform controlled recovery via Wi-Fi AP or serial port
- Do not repeatedly power cycle — the A/B partition mechanism will fall back to the previous partition on the next boot
Wi-Fi STA Connection Failure
- Re-scan for SSIDs
- Check that the password is correct
- Confirm the target Wi-Fi is 2.4 GHz (5 GHz-only hotspots are not supported)
- Check on-site Wi-Fi coverage
TLS Handshake Failure (ChirpStack / TTN)
| Check Item | Action |
| Gateway time | Confirm the gateway has synced time via SNTP |
| Server cert domain | Confirm the domain in tc.uri / cups.uri matches the certificate |
| CA chain | Confirm the uploaded CA certificate is complete |
| Certificate validity | Confirm the server certificate has not expired |
| Mutual TLS CN | Confirm the client certificate CN matches the Gateway ID |
401 Authentication Failure (TTN)
- Check that API Key permissions are correct (LNS Key and CUPS Key cannot be interchanged)
- Confirm the Authorization line is complete and CRLF-terminated
- Confirm the API Key was not mistakenly entered in the client private key field
Deployment Quick Reference
| Step | Action | Time |
| Install antenna | Screw on LoRa antenna | 1 min |
| Install SIM (AG) | Insert SIM card | 1 min |
| Power on | Type-C / DC / PoE | Instant |
| Connect to gateway | Ethernet or Wi-Fi AP | 1 min |
| First login | Enter wifi!0804, change password | 1 min |
| Configure backhaul | Ethernet / Wi-Fi STA / 4G | 3 min |
| Configure LNS | UDP / MQTT / Basic Station | 3 min |
| Configure band | Select region and sub-band | 1 min |
| Verify connection | Trigger end device uplink, confirm data arrival | 2 min |
From unboxing to live deployment, the normal flow takes approximately 15 minutes.
Related Links
- GD6 Open-Source Repository: github.com/ManThink/gd6-open
- GD61x Specifications & User Guide: think-link.net/docs/zh/Device/LoRaWANGateway/gd61x-user-guide
- GD6 Configuration Guide (gwTool6): think-link.net/docs/zh/Device/LoRaWANGateway/gd6-configuration-guide
- Connecting to ChirpStack via Basic Station: think-link.net/docs/zh/Device/LoRaWANGateway/gwtool-chirpstack-basic-station
- Connecting to TTN via Basic Station: think-link.net/docs/zh/Device/LoRaWANGateway/gwtool-ttn-basic-station
- Article 1: ManThink Launches GD6 Open-Source LoRaWAN Gateway: ESP32-S3 + SX1302 Indoor Solution
- Article 2: Inside the GD6: Hardware Design Decisions Behind the ESP32-S3 + SX1302 Gateway
- Article 3: Getting Started with the GD6 Open-Source Gateway: From Clone to Custom Firmware
- ThinkLink Platform: www.think-link.net
- ManThink Official Website: www.manthink.cn